How to Clean Cowboy Boots: A Step-by-Step Guide

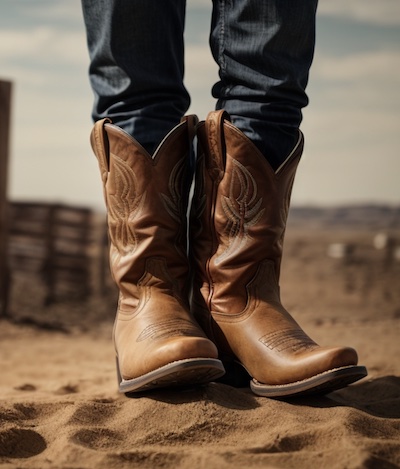
Howdy, partners! If you’re a fan of the Wild West style and own a pair of rugged cowboy boots, you know that keeping them clean and pristine is essential to maintain that classic look. Whether you’ve been two-stepping on the dance floor or herding cattle, your boots have probably seen their fair share of dirt, dust, and mud. But fear not; I’m here to guide you through cleaning your beloved leather companions. This article’ll delve into the art of cleaning cowboy boots, from removing stubborn stains to applying the right conditioner to keep that leather luscious.

Preparing Your Boots for Cleaning

Dusting off the Dirt and Mud 

Before you dive into the cleaning process, give your boots a good shake to rid them of loose dirt and debris. This initial step helps prevent scratching the leather when you start scrubbing. For the stubborn bits stuck in the crevices, use a soft brush with bristles that won’t harm the leather.

Tackling Tough Stains 

If your cowboy boots have encountered more than just ordinary dust, it’s time to roll up your sleeves and tackle those tough stains. Grab a damp cloth, ensure it’s not dripping wet, and gently blot the stained areas. Avoid rubbing vigorously, which could push the stain deeper into the leather. Instead, use a light touch and let the cloth do the work.

Choosing the Right Cleaning Solution 

When cleaning your boots, opt for a mild, leather-friendly cleaner. Avoid harsh chemicals that could strip the leather of its natural oils. You can find specialized leather cleaners at your local store or online. Apply a small amount to a clean, damp cloth and test it on a less visible spot of your boot to ensure it doesn’t discolor the leather.

Softening and Conditioning 

After cleaning, it’s time to condition your cowboy boots to keep the leather supple and prevent cracking. Choose a lanolin-based leather conditioner for the best results. Apply a small amount onto a dry cloth and gently massage it into the leather using circular motions. This will help restore moisture and give your boots a healthy shine.

Letting Your Boots Dry Naturally 

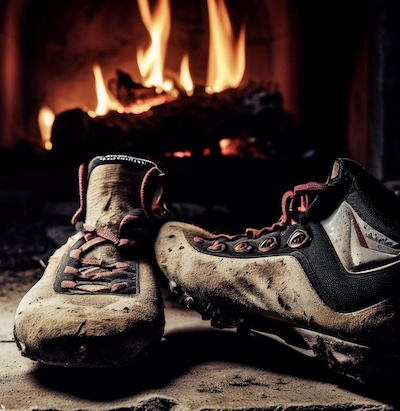
Once you’ve applied the conditioner, allow your boots to dry naturally. Avoid placing them near direct heat sources like radiators or heaters, as this can cause the leather to become brittle. Instead, place them in a well-ventilated area at room temperature. For extra shape retention, consider using a boot tree to maintain their form while they dry.

The Final Touch: Polishing Your Boots 

When your boots are dry and rejuvenated, give them the finishing touch by applying a leather polish. Choose a color that matches your boots and apply a thin, even layer using a clean cloth. Allow the polish to absorb for a few minutes, and then buff your boots using a separate dry cloth until they gleam.

Cleaning and Caring for Your Cowboy Boots

Removing Lingering Dirt and Grime 

Now that your boots are prepped, it’s time to roll up those sleeves and get into the nitty-gritty of cleaning. Take a soft-bristled brush and dip it in a mixture of mild soap and warm water. Gently scrub the entire surface of your boots, paying extra attention to any stubborn spots. Remember, a gentle touch goes a long way in preserving the leather’s integrity.

Wiping Away Excess Soap 

After scrubbing, grab a clean, damp cloth and wipe away the soap residue. Remove all traces of soap, as leftover residue can dull the leather’s shine over time. Give your boots a quick once-over to ensure they’re squeaky clean.

Drying Safely and Thoroughly 

Once your boots are cleaned, it’s time to let them dry again. This time, however, ensure they’re completely dry before moving on to the next step. You can gently pat them down with a dry cloth, absorbing any excess moisture. Allow them to air dry in a cool, shaded area. Patience is critical here – rushing the drying process can lead to warped leather.

Applying the Leather Conditioner 

Remember that lanolin-based leather conditioner we mentioned earlier? It’s time to bring it back into action. Apply a small amount to a clean, dry cloth and gently rub it onto your boots in circular motions. The conditioner not only adds a beautiful lustre but also helps protect the leather from the elements.

Buffing and Polishing 

After applying the conditioner, give your boots a gentle buff using a separate, dry cloth. This will help distribute the conditioner evenly and give your boots a natural shine. If you aim for extra shine, consider using a horsehair brush to polish the leather. This step’s extra effort can make your boots stand out.

Final Touches and Boot Care Tips 

As your boots regain their lustre, take a moment to inspect them closely. If you spot any areas that need more attention, repeat the cleaning and conditioning process. Taking your time and ensuring every inch is treated with care is better.

Storing Your Boots 

Once your boots are gleaming, it’s essential to store them properly. Use a boot tree to help maintain their shape while in storage. Avoid keeping them in damp or humid environments, which can encourage mold growth. Instead, store them in a cool, dry place away from direct sunlight.

Regular Maintenance is Key 

Remember, the key to long-lasting cowboy boots is regular maintenance. Clean and condition them every few months, even if they haven’t been subjected to intense dirt. This routine care will ensure that your boots remain as stunning as the day you first pulled them on.

Partner, you’ve now mastered the art of cleaning and caring for your cowboy boots. Following these steps and adopting a proactive approach to boot care’ll keep your favorite footwear looking sharp and stylish for years. So go ahead, wear your newly cleaned boots, and hit the trails with a confident stride. And remember to stay tuned for more tips and insights right here on our running shoe tips and reviews website. Until next time, happy booting!

How to Clean Climbing Shoes: A Guide for Freshness and Grip

Introduction and Preparations

Why did the climbing shoe blush? Because it saw the boulder crack!

Getting a Grip on Maintenance

Hey there, fellow adventurers and climbers! If you’re anything like me, you’ve probably shared a few memorable moments with your trusty climbing shoes. Those moments involve scaling vertical walls, conquering challenging routes, or clinging onto a boulder like a gecko. But after all the sweat, dirt, and exposure to extreme elements, it’s time to show your climbing shoes some love with a thorough cleaning. In this guide, I’ll take you through the essential steps to ensure your climbing shoes stay fresh, sticky, and ready for the next big adventure.

Preparation is Key: Setting the Stage for Shoe Cleaning

Before you dive into the nitty-gritty of cleaning your climbing shoes, let’s talk preparation. Like gearing up for an ascent, cleaning your shoes requires some planning. Here’s what you’ll need:

  • Gather Your Gear: Get your hands on a soft brush, a dry towel, a bowl of warm water, paper towels, and rubbing alcohol.
  • Choose the Right Spot: Find a clean and well-ventilated area to work on your shoes. Avoid extreme heat and direct sunlight, as they can harm the materials.
  • Be Gentle: Climbing shoes are sensitive creatures. Please treat them with care and avoid using harsh chemicals or abrasive brushes.
  • Mind the Soles: Different climbing shoes have different sole materials, so it’s crucial to know if your shoes are made of rubber or synthetic compounds.

Deep Cleaning and Maintenance

The Initial Steps: Brushing and Wiping

Now that you’ve gathered your gear and set up your cleaning station let’s start with the basics:

  • Dust Off the Dirt: Begin by giving your shoes a gentle but thorough brushing. Use a soft brush to remove dirt, dust, and debris from the exterior. Be especially mindful around the crevices and seams.
  • Wipe Down the Surface: Take a dry towel and give your shoes a wipe-down. This will help remove any remaining dirt and give you a clearer view of areas that need extra attention.
  • Check the Insides: Remember to inspect the inside of your shoes. If they’ve been through some particularly sweaty sessions, consider using a dry towel to blot excess moisture.

The Detailed Cleaning Process: Tailored to Your Shoe Type

Synthetic Climbing Shoes:

If you’re the proud owner of synthetic climbing shoes, here’s how to give them the spa treatment they deserve:

  • Prepare a Cleaning Solution: Fill a bowl with warm water. You can add a mild detergent if your shoes are filthy. Avoid using harsh chemicals that could damage synthetic materials.
  • Gently Scrub: Dip a soft brush into the cleaning solution and gently scrub the exterior of your shoes. Pay extra attention to any stained or soiled areas. Use circular motions and a light touch to avoid damaging the material.
  • Wipe and Rinse: After scrubbing, use a clean damp cloth or paper towel to wipe off the cleaning solution. Then, rinse your shoes with clean water to remove any remaining soap residue.
  • Air Dry: Allow your synthetic climbing shoes to air dry in a cool, shaded area. Avoid direct sunlight and extreme heat, as these can affect the integrity of the materials.

Rubber Sole Climbing Shoes:

For those of you sporting classic rubber sole climbing shoes, the process is slightly different:

  • Dampen the Brush: Moisten the soft brush slightly, then gently scrub your shoes. Use the damp brush to remove dirt and grime from the rubber soles.
  • Rubbing Alcohol Trick: For stubborn stains or sticky residues, dip a cloth in rubbing alcohol and gently dab the affected areas. This can help break down the gunk without damaging the rubber.
  • Wash and Rinse: If your rubber sole shoes are exceptionally dirty, you can hand wash them using mild soap and warm water. Gently scrub the soles and rinse thoroughly.
  • Air Them Out: After cleaning, pat the soles dry with a paper towel and let the shoes air dry. This is especially important to prevent any moisture buildup that might lead to an unpleasant smell.

Tackling Odors and Enhancing Longevity

Now that your climbing shoes are clean and refreshed, let’s address a common concern: shoe odour.

  • Keep Them Dry: Always allow your shoes to dry completely after climbing. Moisture buildup can lead to bacterial growth and unpleasant odours.
  • Use Baking Soda: Sprinkle a small amount of baking soda into your shoes when not in use. This can help absorb moisture and neutralize odours.
  • Wear Socks: While climbing barefoot might feel more natural, wearing moisture-wicking socks can significantly reduce the buildup of sweat and odours.

Conclusion: Your Adventure Awaits

And there you have it, climbers! A comprehensive guide to cleaning your climbing shoes, tailored to their specific materials. Remember, giving your climbing shoes regular attention enhances their performance and prolongs their lifespan. So, next time you’re ready to conquer the crags, you’ll do so with fresh, comfortable, and odour-free shoes. Until then, keep exploring, reaching for new heights, and enjoying the thrill of the climb!

How to Tie Hey Dude Shoes: A Comprehensive Guide to the Perfect Fit

Hey Dude Shoes are a popular casual shoe brand offering a wide range of styles and features. One of the most common questions about Hey Dude Shoes is how to tie them properly for the best fit. With their unique elastic laces and memory foam insoles, tying Hey Dude Shoes correctly ensures maximum comfort and support.

In this article, we’ll explore the different ways to tie Hey Dude Shoes and offer tips and suggestions on achieving the perfect fit. So, whether you’re a long-time wearer of Hey Dude Shoes or a newcomer to the brand, read on to learn more about how to tie them properly.

The Standard Way to Tie Hey Dude Shoes

The most common way to tie Hey Dude Shoes is by pulling the laces tight and tying a knot. This method works well for most styles of Hey Dude Shoes, and it’s easy to adjust the tightness of the laces to achieve the desired fit.

Tighten your Hey Dude shoesTighten your Hey Dude shoes

To tie Hey Dude Shoes, use this method:

  1. Pull the laces tight until the shoes fit comfortably on your feet.
  2. Adjust the laces evenly on both sides to ensure a symmetrical fit.
  3. Once you’ve achieved the desired fit, tie a knot using the standard shoelace knot. This will secure the laces and prevent them from coming undone while you’re wearing your Hey Dude Shoes.

Tying Hey Dude Shoes Using the Side of the Shoe

For a more snug fit, you can also try tying Hey Dude Shoes using the side of the shoe. This method works well for shoes with wider openings or for wearers with narrower feet. To tie Hey Dude Shoes utilizing this method, pull the laces tight and then wrap them around the side of the shoe. This will create a more secure fit and prevent your shoes from slipping or sliding around while walking.

Tying Slip-On Hey Dude Shoes

Hey Dude Shoes also offer a slip-on style, which is great for those who want to avoid dealing with laces at all. However, even slip-on Hey Dude Shoes can benefit from some tightening to achieve the perfect fit. To tighten slip-on Hey Dude Shoes, use your fingers to adjust the elastic laces and ensure they’re snug around your feet.

Overall, there are different ways to tie Hey Dude Shoes to ensure the perfect fit. Stay tuned for the next section, where we’ll cover more tips and tricks to get the most out of your Hey Dude Shoes.

Now that you know the basics of how to tie your Hey Dude shoes, let’s explore some different ways to tie them to achieve different looks and levels of comfort.

  • The Standard Tie
  • The standard tie is the most common way to tie Hey Dude shoes. To achieve this, thread the laces through the eyelets and tie them in a bow on the top of the shoe. Make sure the laces are evenly tightened for a snug fit.
  • The Hidden Knot
  • If you don’t want the bow of your laces to show, try the hidden knot. After tying a standard knot, tuck the remaining laces into the shoe before tying another knot on top of the first one. This way, the bow will be hidden inside the shoe.
  • The LoopBack Tie
  • Try the loop-back tie for a more secure fit and added support. After tying a standard knot, loop the laces back and thread them through the top eyelets on the same shoe side. Cross the laces and thread them through the opposite eyelets, then tie them in a bow on top of the shoe.
  • The Double Knot
  • If your laces tend to come undone easily, try the double knot. After tying a standard knot, tie another knot on top of the first one. This will keep the laces securely tied.
  • The Lace Swap
  • If you want to add personality to your Hey Dude shoes, swap out the laces for a different color or pattern. This is a great way to customize your shoes and make them your own.
  • The No Tie Method
  • If you prefer the ease and convenience of slip-on shoes, try the no tie method. Leave the laces tied in a standard knot and slip your feet in and out of the shoes without untying them. This works especially well with elastic laces.
  • The Zip Tie Method
  • For a quick and easy solution, try the zip-tie method. Replace the laces with zip ties, securing them tightly for a snug fit. This method is especially useful for those with limited mobility or dexterity.

Tightening Your Hey Dudes

If you’re looking for a snug fit for your Hey Dude shoes, you can do a few things to tighten them up. One of the easiest methods is to tighten the laces. First, tighten the laces so the shoes fit snugly around your feet. Then, tie the laces into a knot. You may want to double-knot them to ensure that they stay put.

If the laces aren’t tight enough, you can try a different lacing technique. For example, the “heel lock” technique can help to keep your heel in place and prevent slipping. To use this technique, lace the shoes normally until you reach the second to last eyelets. Then, instead of going straight to the last eyelets, bring each lace end diagonally up and through the opposite eyelet. Finally, tie the laces as usual.

Another option is to replace the laces with elastic laces. Hey Dude offers a wide selection of elastic laces in various colors, so you can find a pair that matches your shoes perfectly. Elastic laces are great for slip-on shoes like Hey Dudes, as they allow you to easily put on and take off your shoes without having to constantly tie and untie them. Plus, they can help to provide a more comfortable fit as they adjust to the shape of your foot.

If you have Hey Dude shoes with memory foam, you may find that they stretch out over time. Try putting the shoes in the freezer for a few hours to combat this. This can help restore the memory foam and make the shoes fit again.

Conclusion

Tying Hey Dude shoes is a common question among many shoe wearers. Whether you have slip-on or lace-up Hey Dudes, there are a variety of ways to tie and adjust them to achieve a comfortable and secure fit. By following the tips outlined in this article, you can ensure that your Hey Dudes fit true to size and provide the support and comfort you need for any occasion.

Crucial Tips: How to Tell if Shoes are Non-Slip

I. Introduction

Wearing non-slip shoes is super important, especially if you work in places where the floors can get slippery. This can happen in lots of different jobs, like working in a restaurant kitchen, a hospital or a hotel. If you wear shoes with good traction, it can help you stay safe and avoid accidents or injuries. Slip-resistant shoes can help you keep your balance and stay on your feet, even on wet or greasy surfaces. It’s always a good idea to make sure you’re wearing the right shoes for the job, so you can stay safe and comfortable while you work.

So, how do you know if your shoes are non-slip? Well, there are a few things to look for. Firstly, check the bottom of the shoe and see what material it’s made of. Rubber soles are usually a good choice for slip-resistant shoes. You can also look for shoes with deep grooves or patterns on the bottom, as this can help create friction on slippery surfaces. Another thing to consider is the shoe’s design – features like a wider heel or reinforced toe area can help improve grip. And finally, the best way to know if your shoes are non-slip is to test them out on a slippery surface. If your shoes have good traction, they won’t slip and you’ll feel more stable on your feet.

II. Look for the Outsole Material

Do you know what the outsole of a shoe is? It’s the part of the shoe that comes in contact with the ground, and it’s super important when it comes to preventing slips and falls. The outsole can be made from a variety of materials, like rubber, PVC, or other types of synthetic materials. The type of material used can have a big impact on how slip-resistant a shoe is. Shoes with a rubber outsole are usually more slip-resistant because rubber has a lot of grip. PVC outsoles can also be good for preventing slips, but they might not be as durable as rubber. So, it’s important to choose shoes with the right type of outsole for the job to keep you safe.

When it comes to non-slip shoes, the material of the outsole is super important. Rubber is a great choice for non-slip shoes because it provides good traction on slippery surfaces. PVC is another material that is often used for non-slip outsoles, but it might not be as durable as rubber. Some shoes have outsoles made from a combination of materials, like rubber and synthetic materials. These types of outsoles can be great for providing both grip and durability. So, if you’re looking for non-slip shoes, be sure to check out the material of the outsole to make sure it’s the right fit for you.

III. Check the Traction Rating

Did you know that some shoes will have a traction rating provided by the manufacturer? This rating is a way for the company to tell you how well the shoe can grip onto surfaces to prevent slips and falls. The rating is usually given on a scale from 0 to 5, with 5 being the most slip-resistant. So, if you’re looking for shoes that can provide excellent traction, look for ones with a high traction rating. However, it’s important to remember that a high rating doesn’t guarantee that you won’t slip – always be cautious and aware of your surroundings!

When you see a traction rating on a shoe, it’s important to know what it means. A higher rating means that the shoe is more slip-resistant, while a lower rating means that it may not be as effective at preventing slips and falls. However, traction ratings aren’t the only factor to consider when choosing non-slip shoes. The outsole material, tread pattern, and shoe design can all play a role in how well a shoe performs on slippery surfaces. So, while traction ratings can be a helpful guide, it’s always a good idea to use caution and common sense when walking on wet or greasy surfaces.

IV. Consider the Shoe’s Design

First, did you know that certain design features can make a shoe more non-slip? That’s right! Some features can enhance the shoe’s grip on slippery surfaces, which can help prevent accidents and injuries. For example, a shoe with a wider heel can provide more stability when walking, and a reinforced toe area can help you grip the ground better. When shopping for non-slip shoes, it’s always a good idea to look for these features to ensure that you’re getting a shoe with the best possible grip.

Secondly, shoes with deep grooves and a tread pattern can also be more non-slip. The grooves create friction against the ground, which can help prevent slipping. Additionally, shoes with anti-slip materials, such as rubber or PVC, can provide better traction. These materials are often used in industrial and work settings where slipping can be a hazard.

Lastly, when it comes to choosing non-slip shoes, it’s important to consider the type of surface you’ll be walking on. Shoes that are non-slip on one surface may not be as effective on another. For example, shoes that work well on tile floors may not be as effective on a wet or greasy surface. Always keep this in mind when shopping for non-slip shoes, and make sure to test them out on the surfaces you’ll be walking on most often.

V. Test the Shoes on a Slippery Surface

The best way to know if a shoe is really non-slip is to test it on a slippery surface. You can’t always trust the manufacturer’s claims or ratings. To test the shoes at home, you’ll need some common household items like vegetable oil or soap. Spread a small amount of the oil or soap on a tiled or wooden floor, then step onto the surface with the shoes you want to test. If the shoes have a good grip, they shouldn’t slide around or make you feel like you’re about to fall.

Testing shoes on a slippery surface is a simple way to check their slip-resistant properties. However, it’s important to conduct the test safely. Make sure the area you’re testing is clear of obstacles or hazards, and use only a small amount of oil or soap to avoid creating a large mess. Also, be cautious when stepping onto the surface and keep your weight balanced to avoid falling. If possible, have someone with you to assist and keep an eye out for any safety concerns.

Minding that, while there are many design features and ratings to look out for when shopping for non-slip shoes, testing them on a slippery surface is the most reliable way to determine their slip-resistant capabilities. With some simple household items and safety precautions, you can conduct this test at home and feel more confident in your choice of footwear. Remember, safety should always come first, so take the necessary precautions when testing shoes or walking on slippery surfaces.

VI. Conclusion

So, to sum up, what we’ve learned: wearing non-slip shoes is important in certain work environments, such as those where floors may be wet or greasy. There are several ways to determine if a shoe is non-slip, including checking the tread pattern and outsole material, looking for traction ratings, and testing the shoes on a slippery surface. Certain design features can also enhance a shoe’s slip-resistant properties. Finally, the most reliable way to determine if a shoe is non-slip is to test it on a slippery surface, using common household items like dish soap or vegetable oil.

Remember, wearing non-slip shoes can help prevent slips and falls, which can lead to serious injuries. Whether you work in the food service industry, healthcare, or any other field where non-slip shoes are recommended, it’s important to choose the right shoes for the job. By using the tips in this article to determine if a shoe is non-slip, you can feel confident in your footwear choice and reduce your risk of injury on the job.

In conclusion, selecting the right shoes for your work environment can make a big difference in preventing slips and falls. Non-slip shoes are an important safety feature, especially in certain situations. By checking the outsole material, tread pattern, and other design features, as well as conducting your own slip-resistance test at home, you can find the right shoes to meet your needs. So, don’t forget to consider slip resistance when shopping for your next pair of work shoes!